Addnig MIDI port to Monotribe
Instruction for adding MIDI port to Monotribe
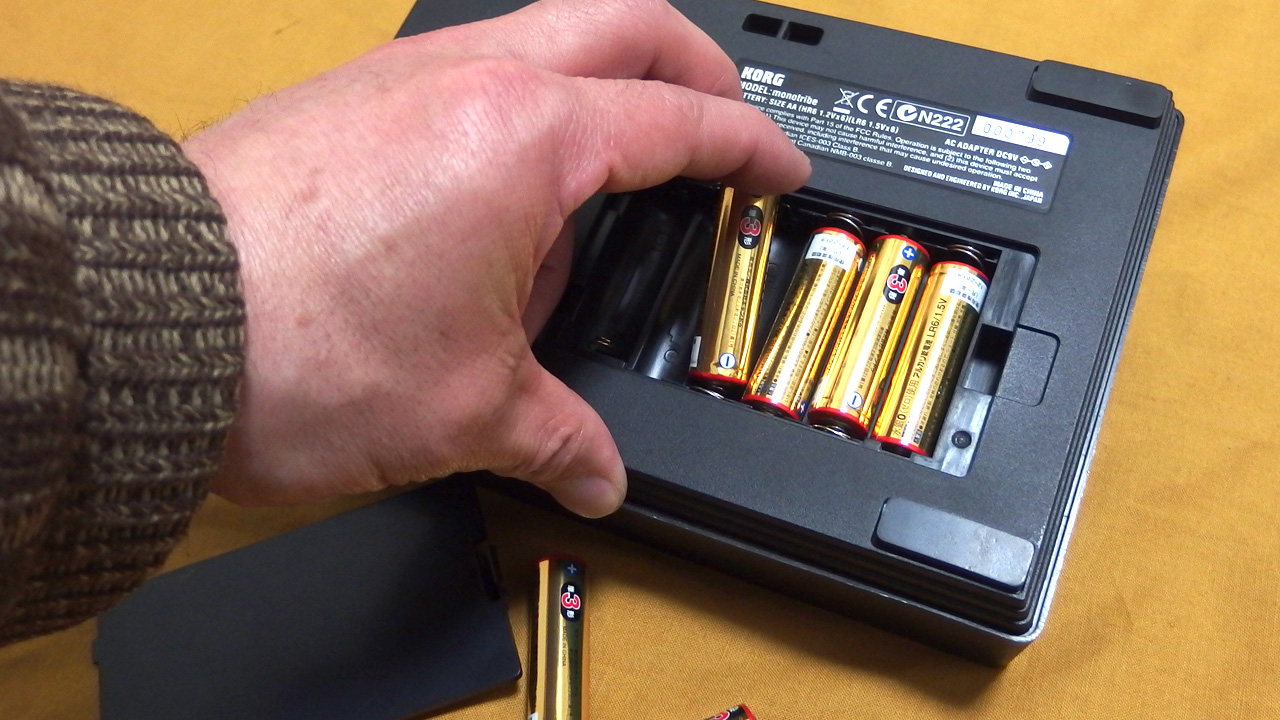
Remove batteries
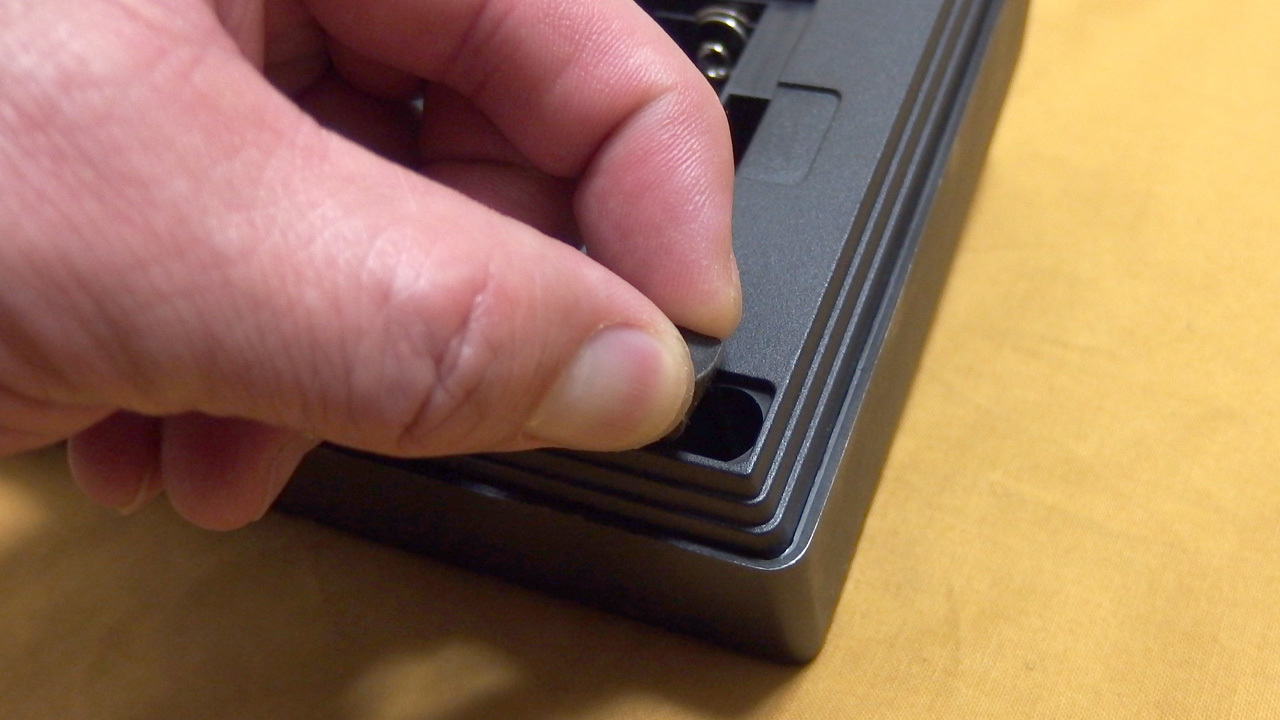
Finding screws
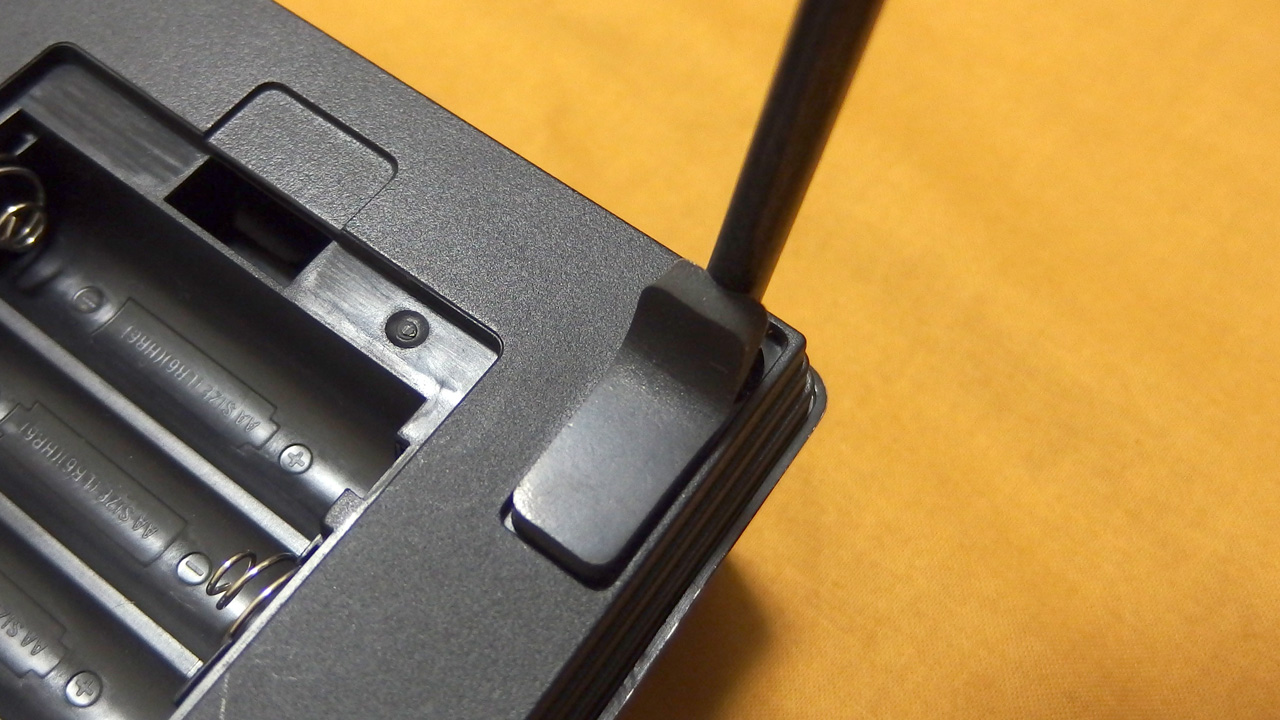
remove it
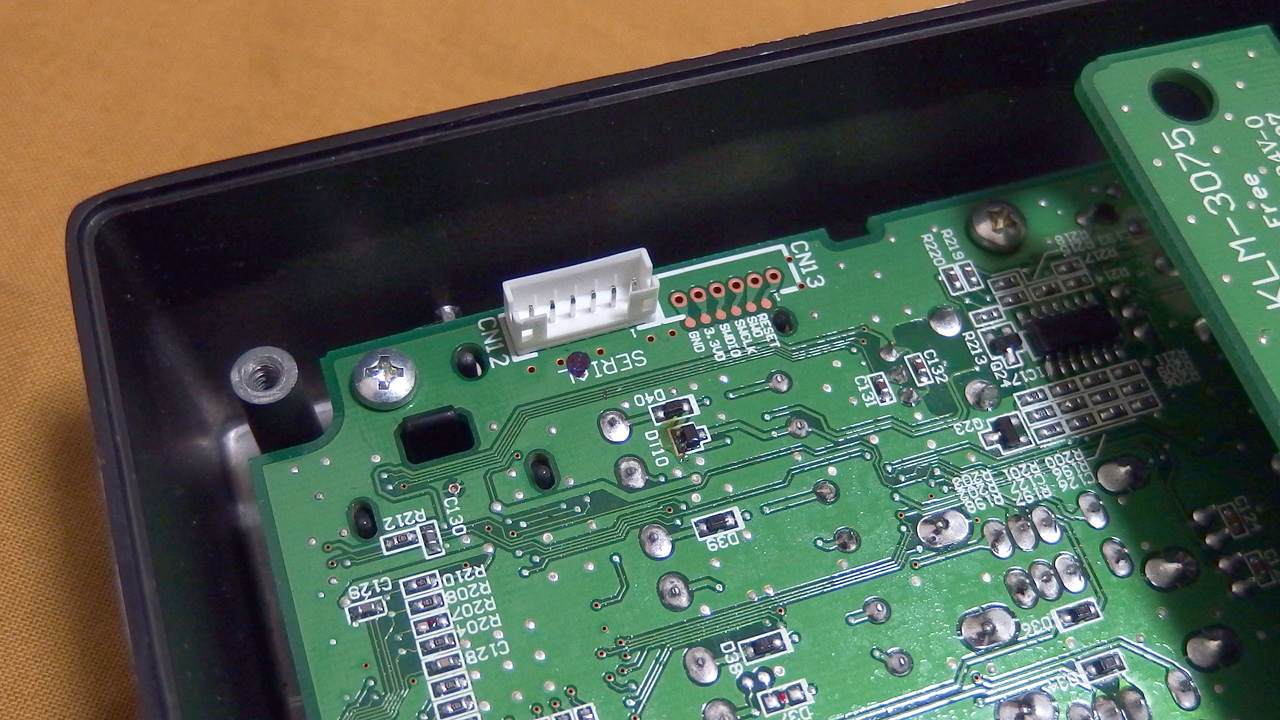
finding connector that we need
Remove batteries and four screws under the rubber feet at back bottom panel. these pictures show the easy way to do it. The metal dust of enclosure when you dig holes may make short circuit or something. So you should better to remove all the components inside of the monotribe. but re-build it correctly may be not easy.
any way lets get find the connectors that we want, first.back bottom panel is connected to power board of the monotoribe inside. you can also remove it.
any way lets get find the connectors that we want, first.back bottom panel is connected to power board of the monotoribe inside. you can also remove it.
電池をはずし、ゴム足の下にある4本のネジをはずします。この写真では、簡単な方法を紹介しますが、エンクロージャの加工のさいに出る切りかすが、回路をショートさせる可能性があるので、本当ならば、中身を全部出して作業するののがベストです。まずは、動くかどうかのテストで、まずは、狙いのコネクタがどこに在るかをチェックしましよう。
Let’s go ahead
put it as you can put.
Double line connector is MIDI-IN. And triple line connector is MIDI-OUT. before do something on to your enclosure, test it if it works fine or not.
2本線のコネクタが、MIDI-IN、3本線のコネクタが、MIDI-OUTです。エンクロージャの加工を始める前に、思ったとおり動作するかどうか確かめて見ましょう。
test it if it work fine or not.
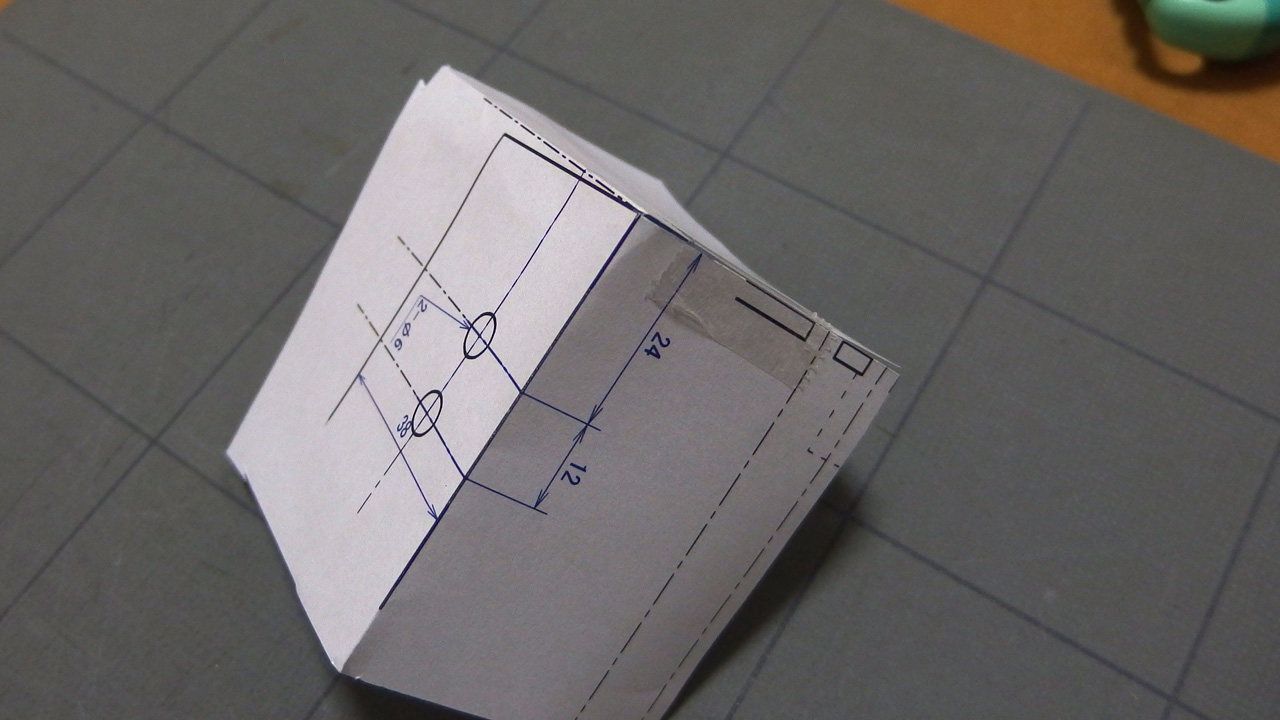
making template for the holes
Download the drawings from next link
以下のリンクの図面のPDFファイルをダウンロードしてください
print out it And cut it out just the same as the picture above and make it as the template to digging holes on the enclosure.
この図面をプリントアウトして切り抜き、写真のようにセロテープなどで止めて穴を開ける場所を出すためのテンプレートを作ります。
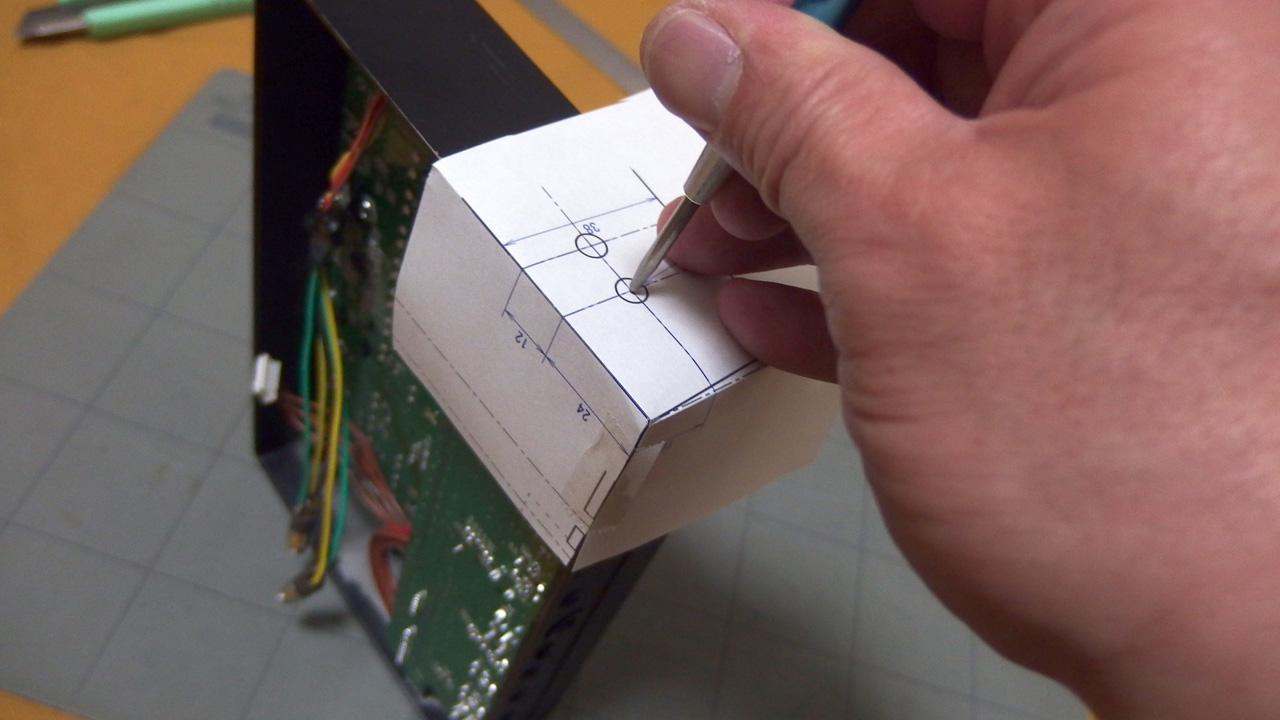
mark the point to dig holes
dig it!
dig it2
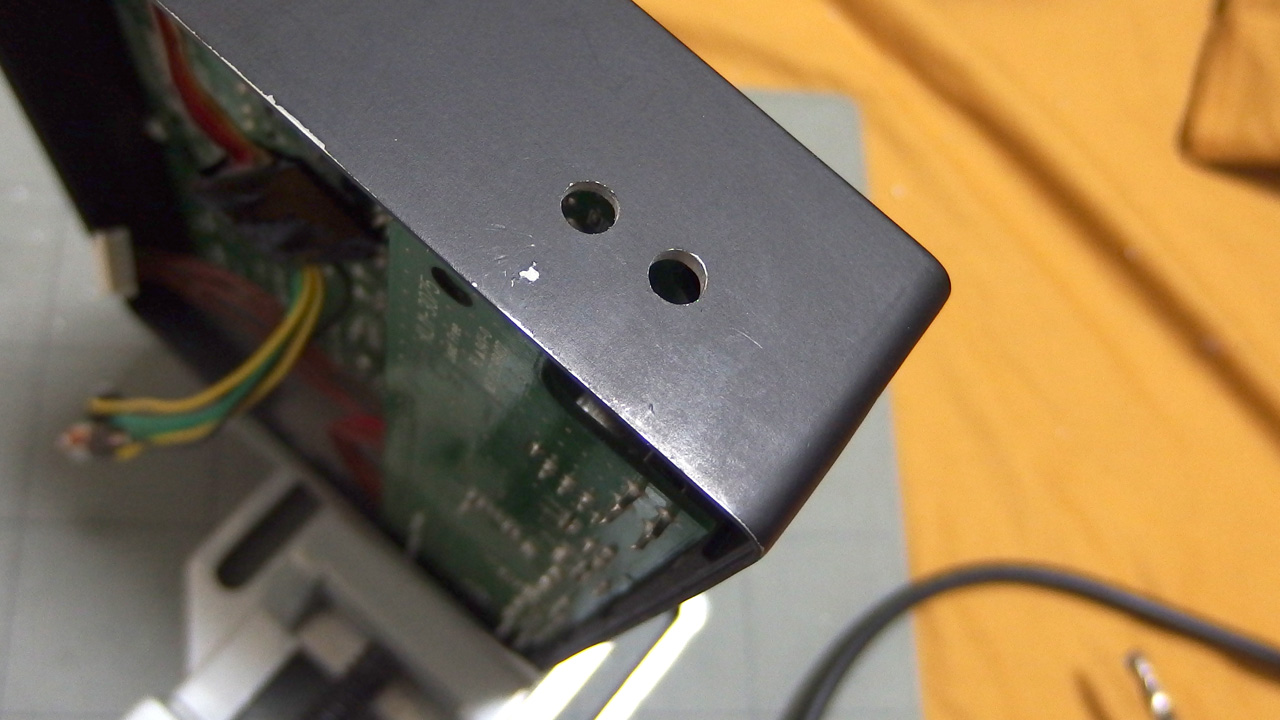
getting a holes
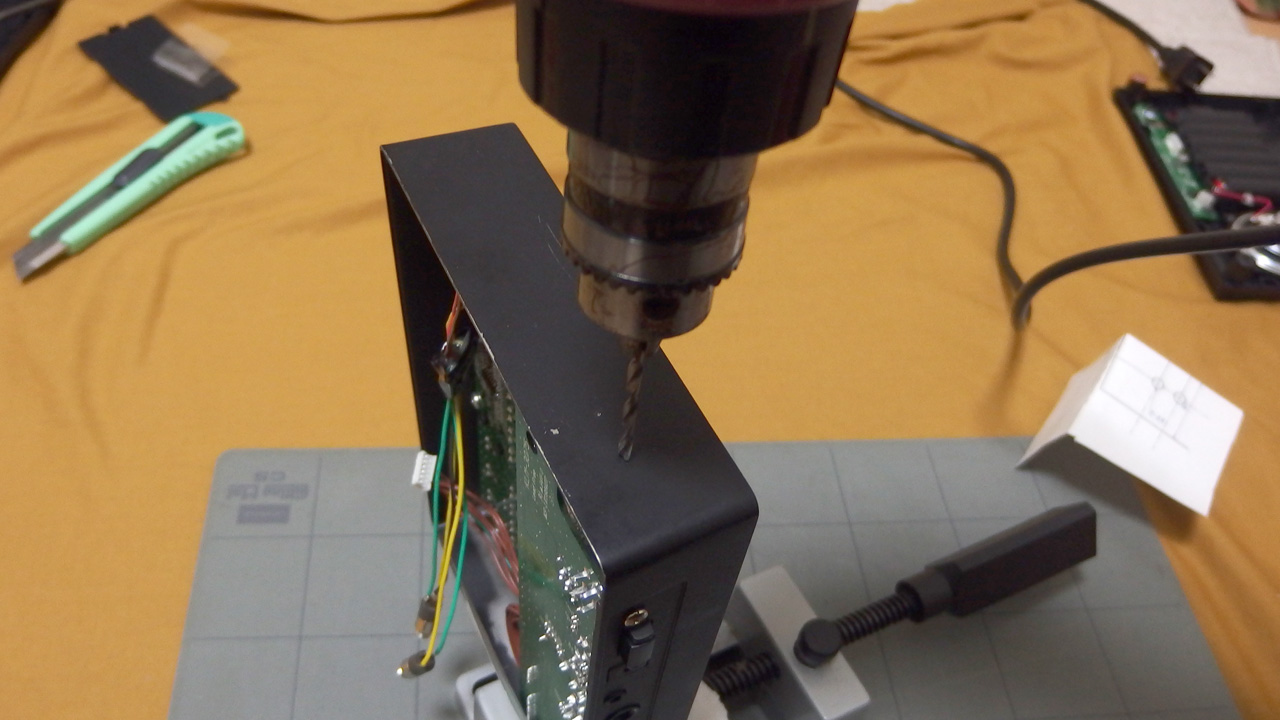
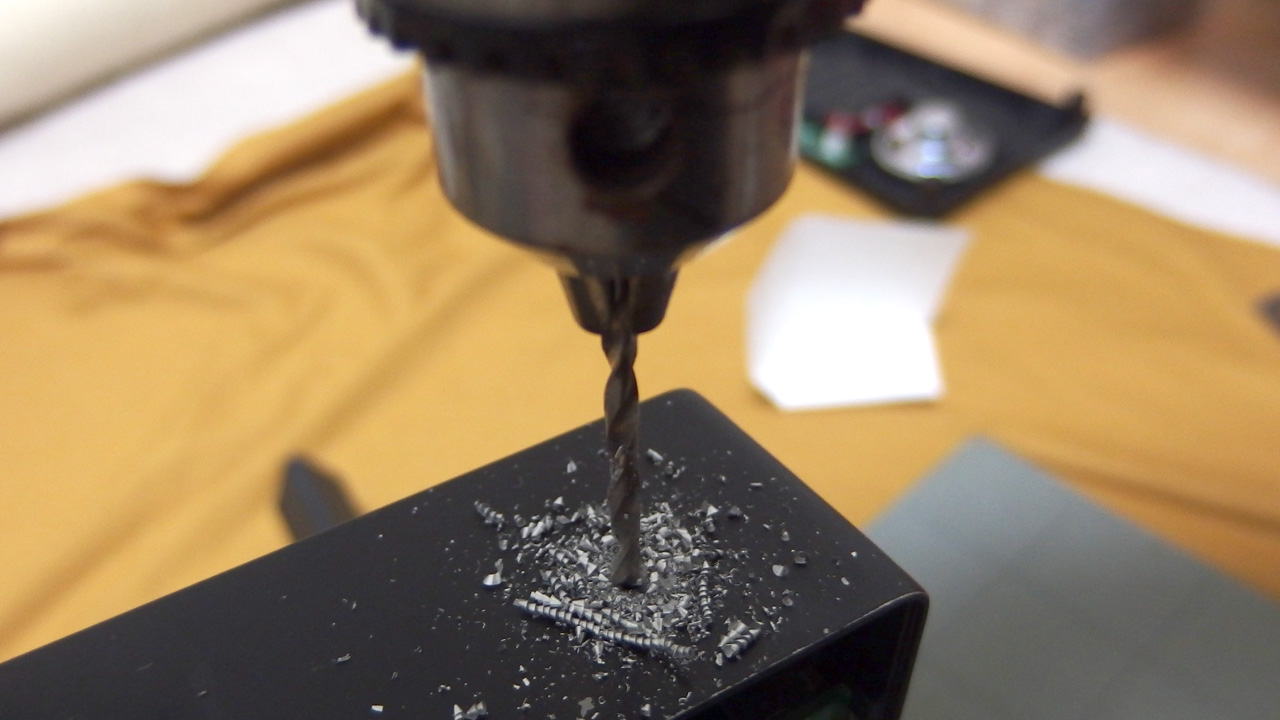
As I wrote before, you should better to remove all the components inside of the enclosure to avoid the short circuit by metal dust. you should better to use vacuum cleaner when you use the drill or so.
there is small tips to digging hole at correct position. Don’t use 6mm drill first, you should better use more thin size, for example 3mm or so.
and change the size of drill and spread it as you need.
there is small tips to digging hole at correct position. Don’t use 6mm drill first, you should better use more thin size, for example 3mm or so.
and change the size of drill and spread it as you need.
先にも書いたとおり、エンクロージャの金属の切りくずが内部の基板をショートさせる可能性が在るので、できるなら中身を全部出し作業する事が望ましいです。どうしてもの時には、掃除機でゴミを吸出しながら、少しずつの作業をお勧めします。
上手に狙った場所に穴を開けるテクニックとしては、いきなり6mmのドリルは使わず、先に3mm程度のドリルで穴をあけ、5mm、6mmと、ドリルの太さを変えながら、狙いのサイズの穴に広げていきます。
上手に狙った場所に穴を開けるテクニックとしては、いきなり6mmのドリルは使わず、先に3mm程度のドリルで穴をあけ、5mm、6mmと、ドリルの太さを変えながら、狙いのサイズの穴に広げていきます。

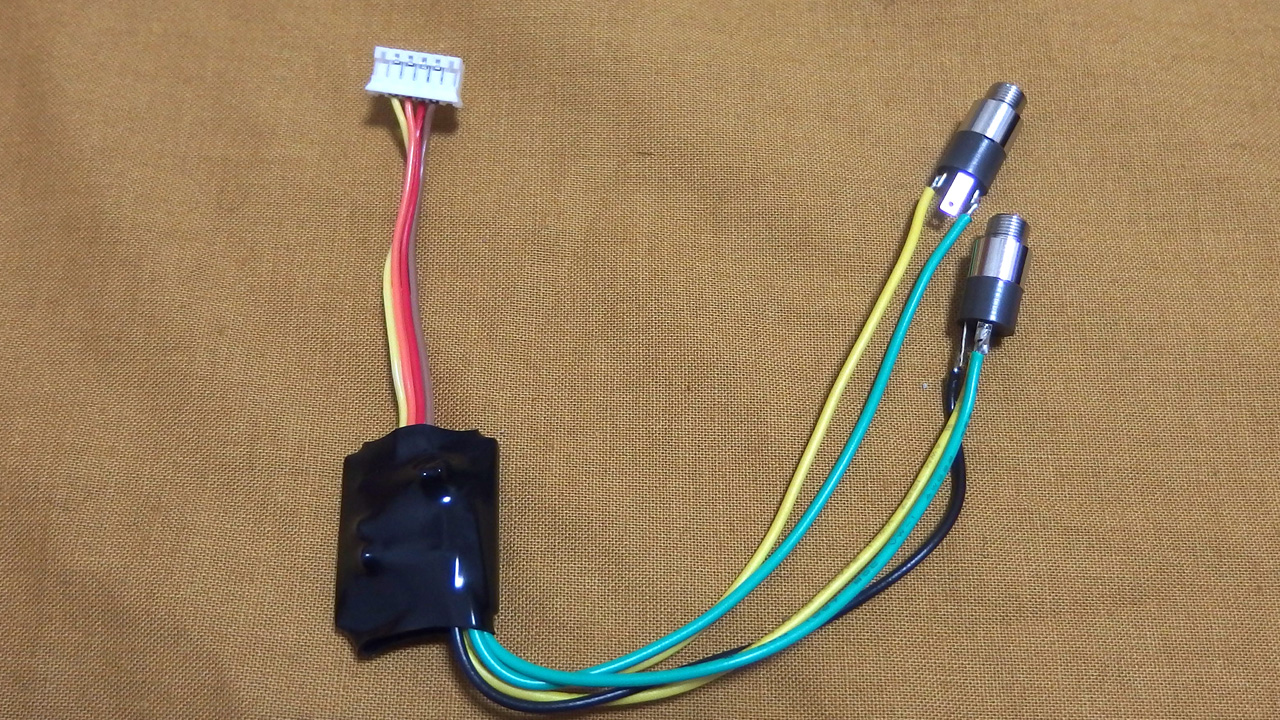
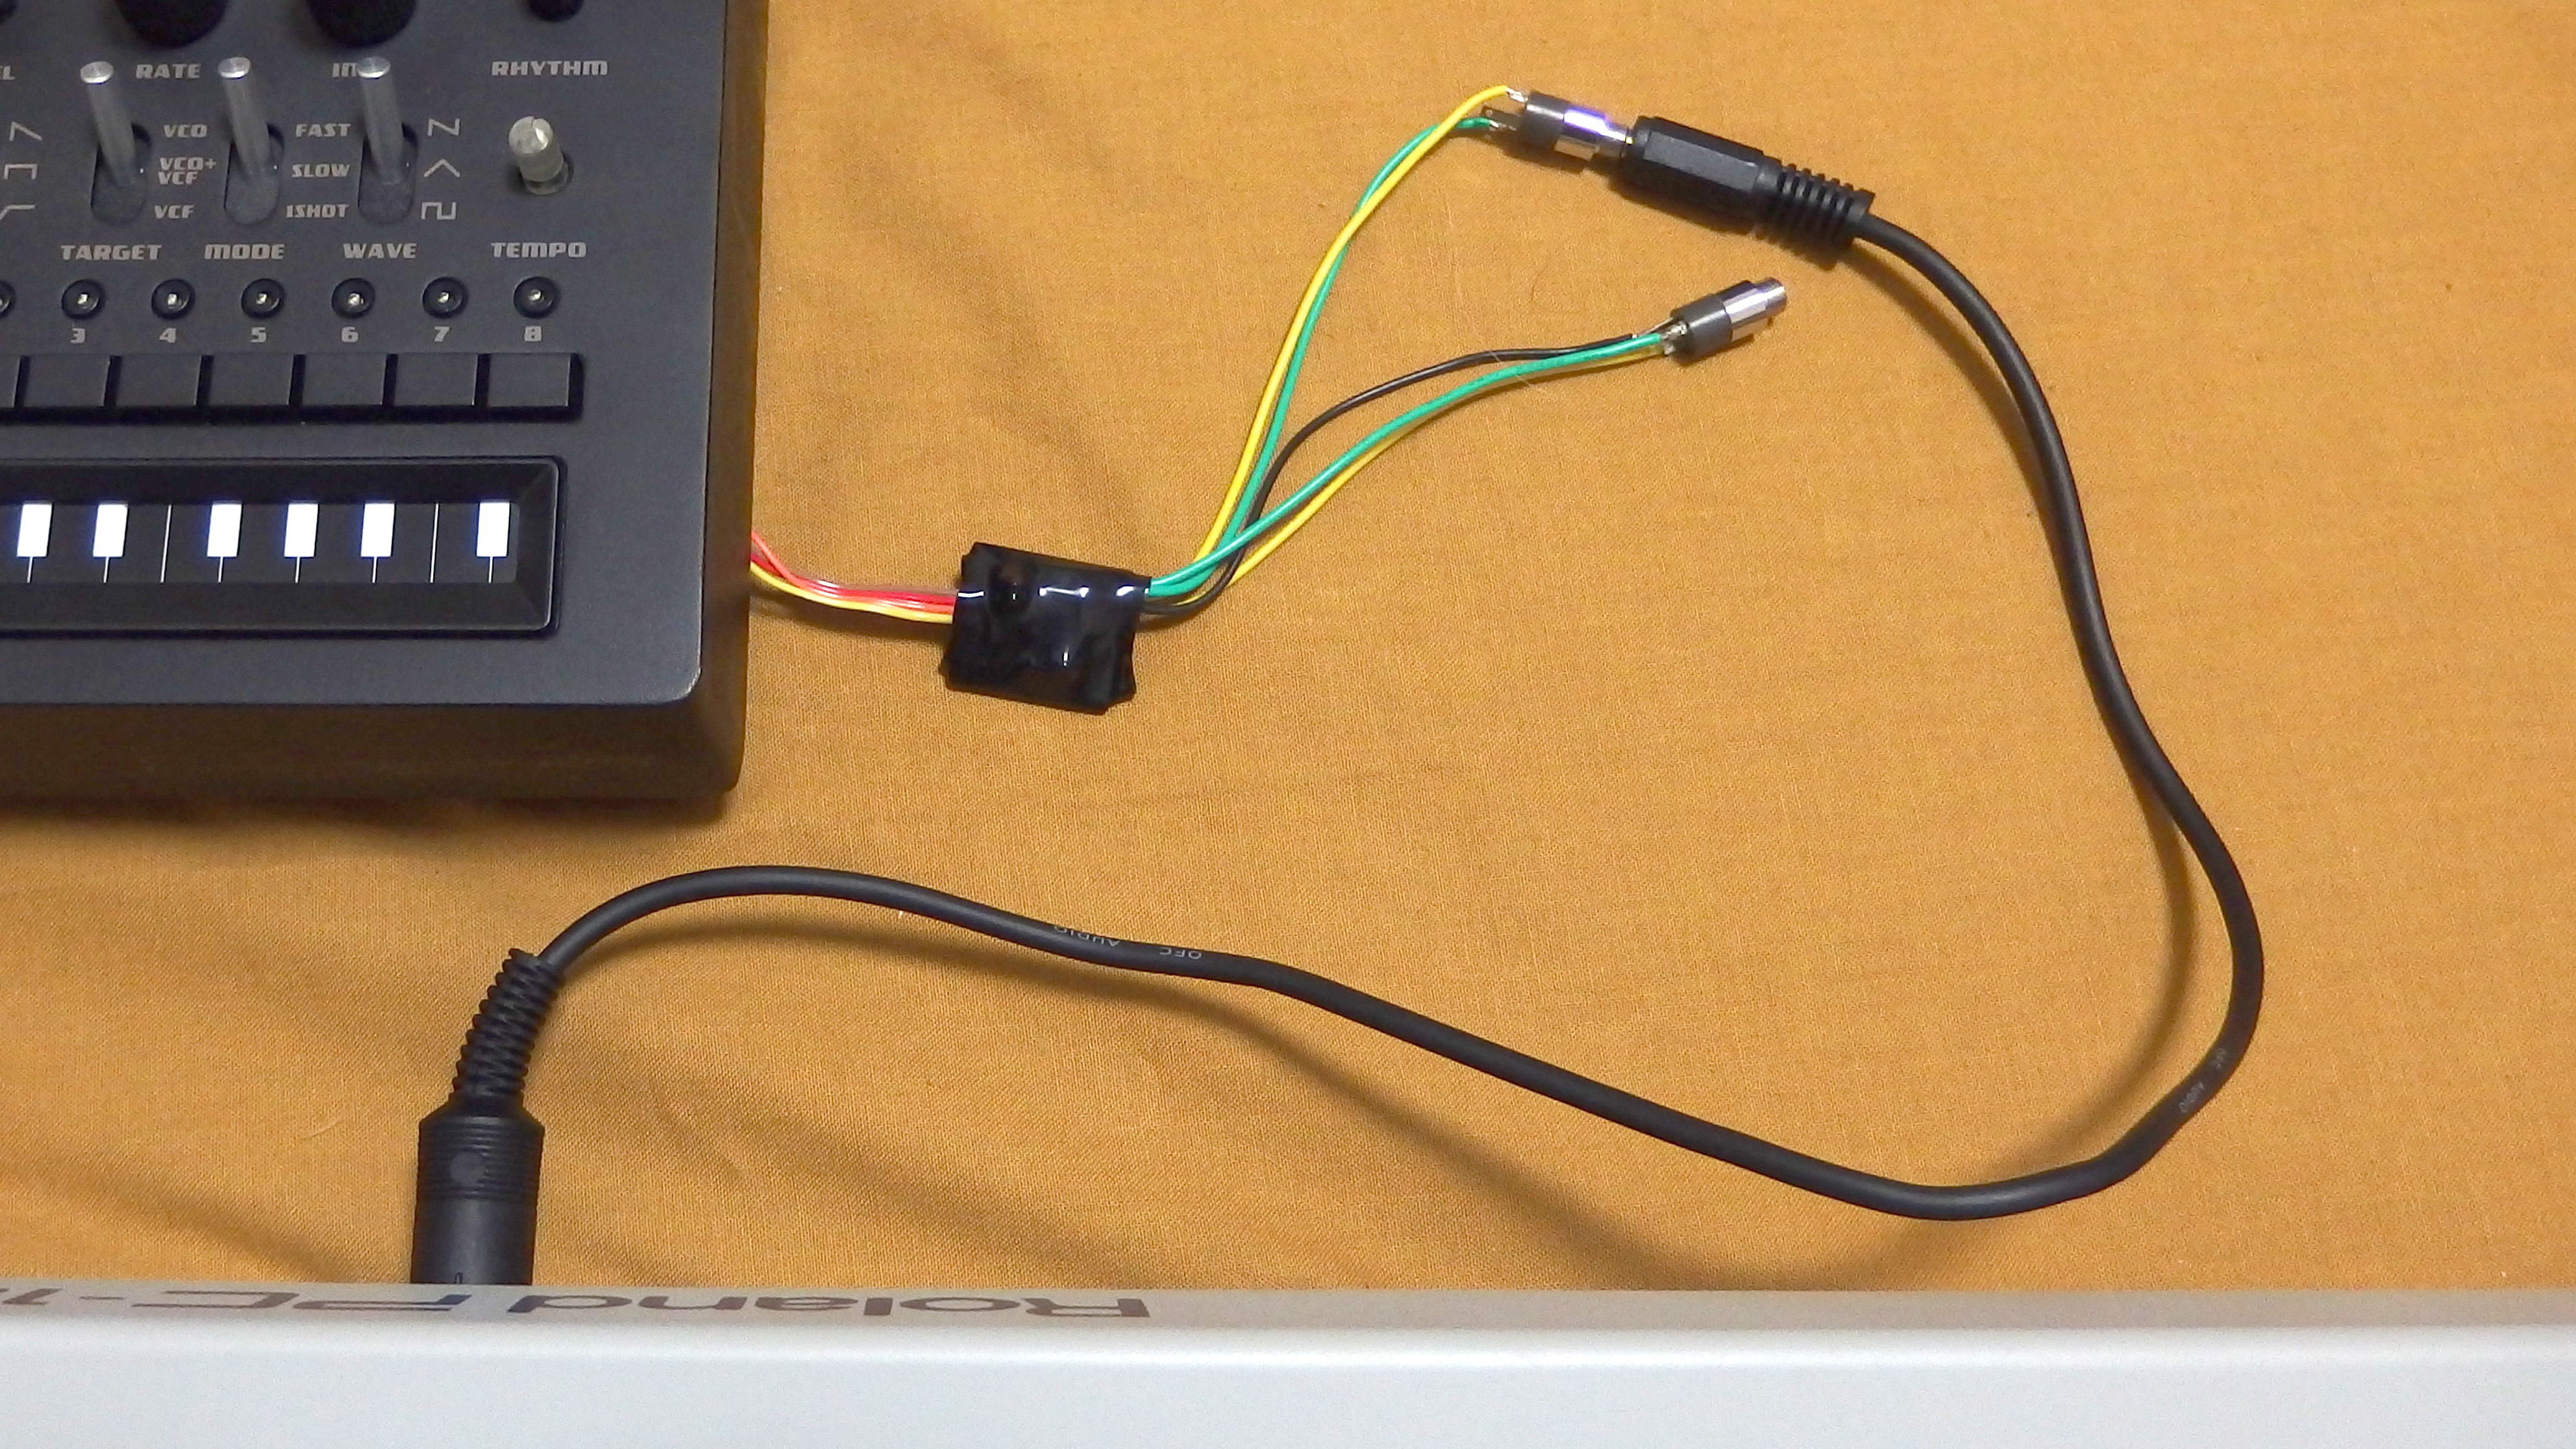
fix the connectors
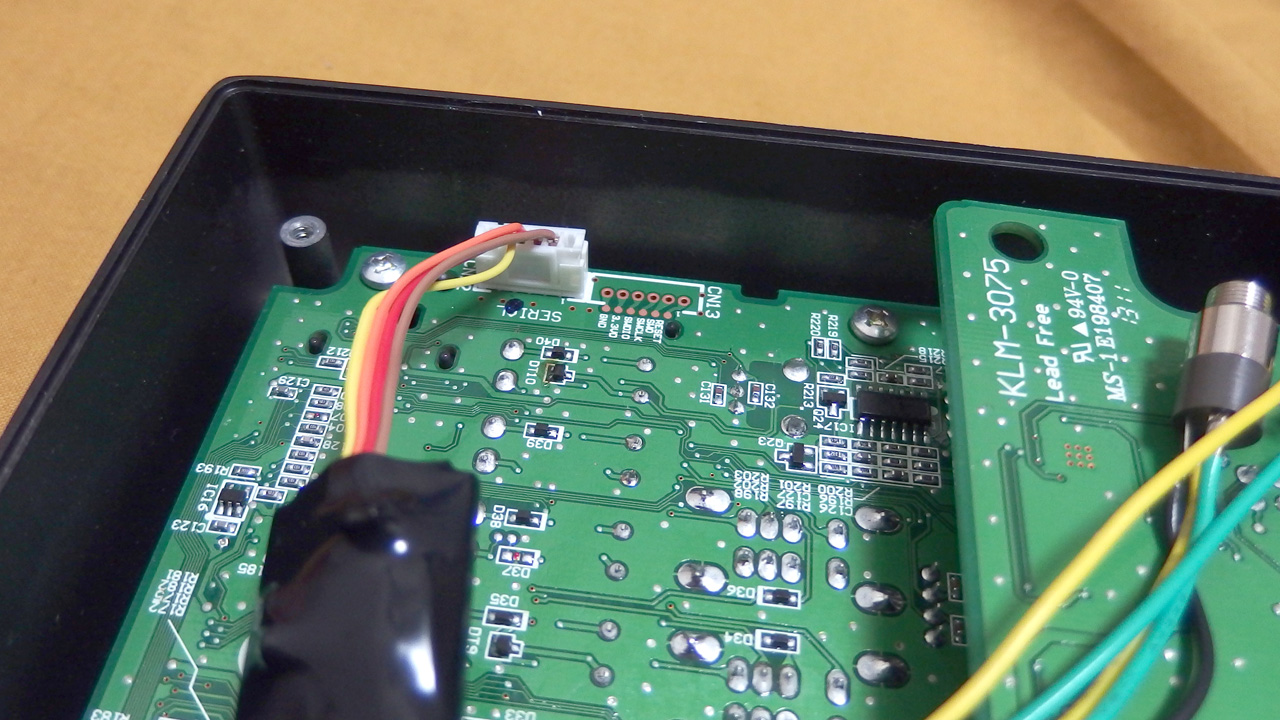
Don’t forget to connect the connect power board and back the bottom panel before put back it and re-screw.
蓋をするまえに、バックパネルと、本体内の電源ボードのコネクタの接続を忘れないようにしてください。
”monotribe” is trademark of KORG INC.